Blog

  • Bariatric-Friendly Leftover Turkey Chili Recipe

    Bariatric-Friendly Leftover Turkey Chili Recipe

    Revamping Holiday Leftovers

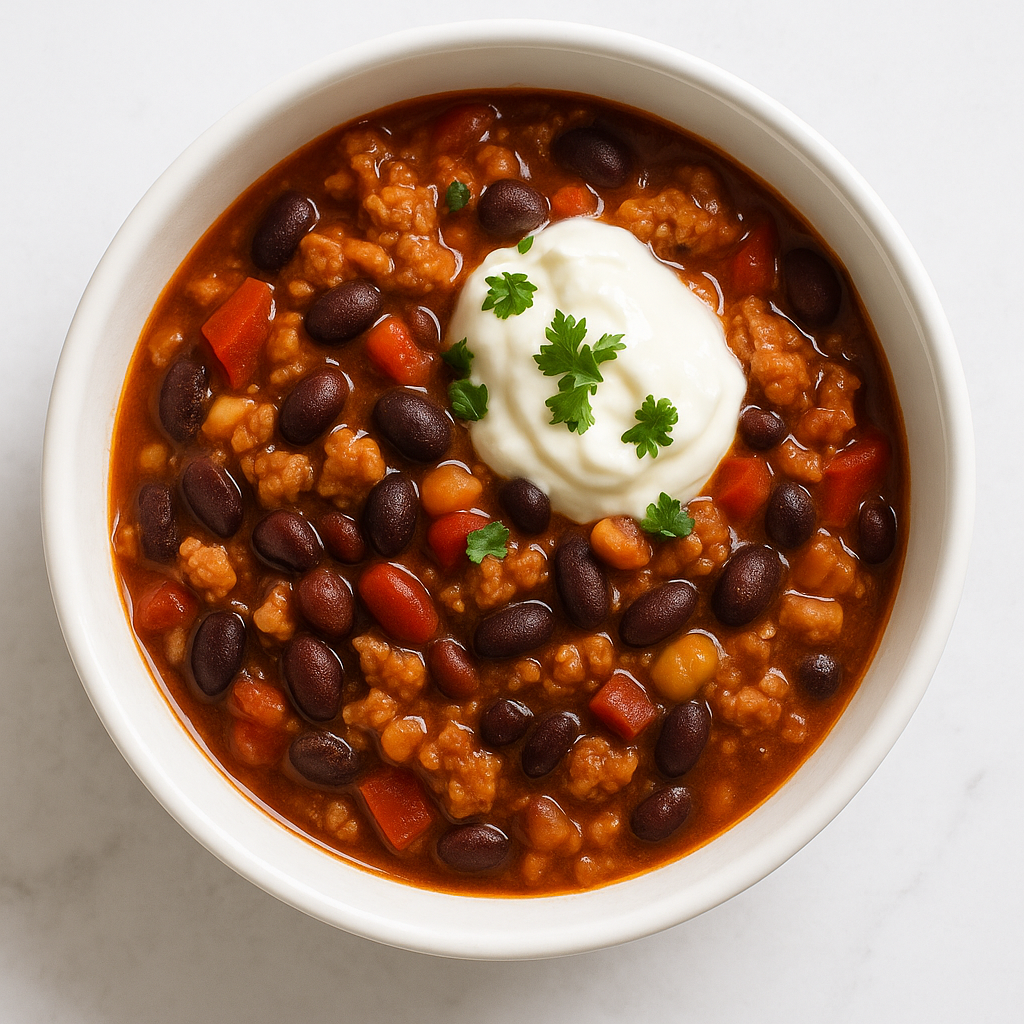
    Now that the holidays are over, you might have some tasty turkey leftovers in your fridge. Rather than letting them sit, try making a simple, bariatric-friendly turkey chili. It’s a great way to enjoy your leftovers and get plenty of protein. Here’s an easy recipe that fits your post-surgery needs.

    Ingredients for a Healthy Chili

    Gather the following ingredients to create your healthy post-surgery meal:

    • 2 cups shredded leftover turkey (preferably lean)
    • 1 can (15 oz) low-sodium black beans, rinsed and drained
    • 1 can (15 oz) diced tomatoes
    • 1 medium onion, chopped
    • 2 cloves garlic, minced
    • 2 cups low-sodium chicken broth
    • 1 tbsp chili powder
    • 1 tsp cumin
    • Greek yogurt (for topping instead of sour cream)
    You can also add finely diced bell peppers, zucchini, or carrots.
    These vegetables soften nicely as they cook, adding extra fiber without making the chili too heavy.
    If you’re sensitive to spice, start with ½ tablespoon chili powder and skip cayenne.

    Simple Cooking Instructions

    Follow these step-by-step instructions for your bariatric-friendly chili:
    In a large pot, sauté the onion and garlic on medium heat until softened.
    Once the onion and garlic are softened, add a few tablespoons of broth and let them simmer for 5 to 7 minutes.
    This helps them become even softer before you add the rest of the ingredients.
    This helps reduce digestive discomfort early post-op.
    Add the shredded turkey, black beans, diced tomatoes, chicken broth, chili powder, and cumin. Stir well.
    Bring the mixture to a boil, then reduce to a simmer.
    Cook uncovered for about 20 minutes, or until the sauce has thickened.
    When serving, start with a portion between half a cup and one cup, based on your current dietary phase and what feels comfortable.
    Warm the chili and add a spoonful of Greek yogurt on top for a creamy finish.

    Nutritional Highlights

    • Calories: ~180–220 per cup
    • Protein: 25–30g
    • Carbs: 15–20g
    • Fat: 3–5g

    This high-protein chili is not only delicious but also meets your dietary requirements:

    • High in protein for muscle recovery.
    • Low in sugar and fat, perfect for weight loss.
    • High in fiber from beans, helping maintain gut health.
    • Portion-control friendly, ideal for post-surgery eating.

    Meal Prep Tips

    For an efficient meal prep, consider the following:

    • Refrigerate leftovers in portion-controlled containers for easy meal preparation.
    • Freeze the chili in single servings for quick reheating.
    • When reheating, use the microwave or stovetop until the food is thoroughly heated.

    Mindful Eating Reminder

    Enjoy your healthy leftover turkey chili mindfully. Take your time to savor the flavors and nourish your body. Every bite counts!

    If you loved this healthy leftover turkey chili, share it or save it for your next cozy meal!

  • Bariatric-Friendly Cranberry Muffins with Walnut Topping

    Bariatric-Friendly Cranberry Muffins with Walnut Topping

    Rediscovering the Joy of Baking

    After bariatric surgery, I really missed the flavors of holiday baking. Muffins used to be a favorite breakfast in my home, but traditional recipes felt off-limits. Then I found this cranberry muffin recipe that satisfies my cravings and fits my healthier lifestyle.

    Wholesome Ingredients for Healthier Muffins

    These healthy cranberry muffins are full of protein, lower in sugar, and topped with crunchy walnuts. The walnuts add a nice texture, so you can enjoy this treat without feeling guilty. Here’s what you’ll need:
    • 1 cup almond flour
    • ½ cup oat flour (or finely ground oats)
    • 1 tsp baking powder
    • ÂĽ tsp baking soda
    • 1 egg (or 2 egg whites)
    • ÂĽ cup unsweetened applesauce
    • 2 tbsp nonfat Greek yogurt
    • 2 tbsp sugar-free sweetener (like erythritol or monk fruit)
    • ½ tsp vanilla extract
    • ½ cup fresh or frozen cranberries (no added sugar)
    • 2 tbsp chopped walnuts (for topping)
    • Optional: ÂĽ tsp orange zest for brightness
    Optional enhancements:
    • Add 1 scoop (10–15g) unflavored protein powder to dry ingredients for a higher-protein version.
    • Add a pinch of salt to balance sweetness and deepen flavor.

    Simple Steps to Delicious Muffins

    Let’s get baking! Follow these simple steps for your high-protein, low-sugar muffins:
    1. Updated Method with Optional Adjustments
    2. Preheat oven to 350°F (175°C). Line a muffin tin with paper liners.
    3. In a bowl, whisk together almond flour, oat flour, baking powder, baking soda, and (if using) protein powder, along with salt.
    4. In another bowl, mix egg, applesauce, yogurt, sweetener, and vanilla until smooth.
    5. Combine wet and dry ingredients; fold in cranberries gently. If the batter feels too thick, add 1–2 tbsp unsweetened almond milk.
    6. Spoon batter into muffin cups (Âľ full).
    7. Top with chopped walnuts.
    8. Bake 15–18 minutes, until golden and a toothpick comes out clean.
    9. Let the mixture cool in the pan for 5 minutes, then transfer it to a rack.
    Tip: Almond flour can burn on the edges, so it’s best to bake these muffins on the middle rack.
    If you want more protein, add a scoop of unflavored protein powder to the dry ingredients. If the cranberries taste too tart, try mixing them with a little sweetener.

    NUTRITIONAL INSIGHT

    Your nutritional claims are accurate. This recipe is high in protein, low in sugar, and fits well within bariatric guidelines.
    Estimated per muffin (makes 8–10):
    • Calories: 140–160
    • Protein: 8–10g
    • Carbs: 7–9g
    • Fat: 8–10g
    • Sugar: <2g (using erythritol)
    These muffins are safe and filling for post-surgery meal plans. They work well for breakfast, snacks, or dessert.
    These muffins are low in carbs, high in healthy fats, and gentle on digestion, which makes them great for post-bariatric breakfasts. They go well with coffee, tea, or a spoonful of Greek yogurt for a balanced, high-protein start to your day.
    Storage:
    • Fridge: 5 days in an airtight container
    • Freezer: Up to 2 months. Reheat gently in the microwave for 15–20 seconds.
    I encourage you to share photos of your muffins or your favorite bariatric-friendly baked goods on Pinterest or Instagram. Let’s inspire others in their journey towards a healthier lifestyle!

    Rediscovering the Joy of Baking

    After undergoing bariatric surgery, many of us find ourselves missing the joyful flavors of holiday baking. Muffins were a beloved breakfast treat in my household, but the thought of indulging in flour-filled, sugary delights became a daunting challenge. That was until I discovered this bariatric-friendly muffin recipe for cranberry muffins that not only satisfies my cravings but also aligns with my healthier lifestyle!

    Wholesome Ingredients for Healthier Muffins

    These delicious, healthy cranberry muffins are packed with protein, lower in sugar, and feature a delightful walnut topping. The crunchy texture of walnuts elevates the experience, making it a treat to enjoy without the guilt. Here’s what you’ll need:

    • 1 cup almond flour
    • ½ cup oat flour (or finely ground oats)
    • 1 tsp baking powder
    • ÂĽ tsp baking soda
    • 1 egg (or 2 egg whites)
    • ÂĽ cup unsweetened applesauce
    • 2 tbsp nonfat Greek yogurt
    • 2 tbsp sugar-free sweetener (like erythritol or monk fruit)
    • ½ tsp vanilla extract
    • ½ cup fresh or frozen cranberries (no added sugar)
    • 2 tbsp chopped walnuts (for topping)
    • Optional: ÂĽ tsp orange zest for brightness

    Simple Steps to Delicious Muffins

    Let’s get baking! Follow these simple steps for your high protein low sugar muffins:

    1. Preheat your oven to 350°F (175°C) and line a muffin tin with paper liners.
    2. In one bowl, whisk together the almond flour, oat flour, baking powder, and baking soda.
    3. In another bowl, mix the egg, applesauce, yogurt, sweetener, and vanilla until smooth.
    4. Combine the wet and dry ingredients, folding in the cranberries gently.
    5. Spoon the batter into the muffin cups, filling about Âľ full.
    6. Sprinkle the chopped walnuts on top of each muffin.
    7. Bake for 15-18 minutes, or until golden and a toothpick comes out clean.
    8. Allow to cool completely before serving.

    For extra protein, consider adding a scoop of unflavored protein powder to the dry mix. If you find the cranberries too tart, mixing them with a pinch of sweetener works wonders!

    These muffins are not only low-carb and high in healthy fats, but they are also gentle on digestion—making them ideal for post-bariatric breakfast ideas. Pair them with a warm cup of herbal tea or some Greek yogurt for an added protein boost!

    I encourage you to share photos of your muffins or your favorite bariatric-friendly baked goods on Pinterest or Instagram. Let’s inspire others in their journey towards a healthier lifestyle!

  • Comfort in a Bowl: Bariatric-Friendly Pumpkin Sweet Potato Soup

    Comfort in a Bowl: Bariatric-Friendly Pumpkin Sweet Potato Soup

    Finding Comfort After Bariatric Surgery

    Hi, I’m Valerie! After my bariatric surgery, I found myself wanting warm, comforting meals, especially when the weather turned cold. I wanted dishes that felt special but were still light and nourishing. That’s how I came up with this pumpkin sweet potato soup. It’s creamy, cozy, and perfect for fall, plus it’s gentle on digestion and full of nutrients.

    Ingredients You’ll Need

    To make this delicious bariatric-friendly pumpkin soup, gather the following ingredients:
    • 1 small sweet potato, peeled and diced
    • 1 cup pumpkin purĂ©e (unsweetened)
    • 2 cups low-sodium chicken or vegetable broth
    • ½ cup unsweetened almond milk or skim milk
    • ÂĽ cup nonfat Greek yogurt (for creaminess and protein)
    • ½ small onion, diced
    • 1 clove garlic, minced
    • ½ tsp ground cinnamon
    • ÂĽ tsp nutmeg
    • Salt and pepper to taste
    Optional toppings: plain Greek yogurt swirl, roasted pumpkin seeds, or chopped chives.
    Optional enhancement: Add ÂĽ teaspoon of ginger for a brighter flavor and anti-inflammatory benefits. Ginger is also gentle and soothing for the digestive system.

    Step-by-Step Instructions

    1. In a medium pot, sauté the diced onion and minced garlic in a teaspoon of olive oil until fragrant.
    2. Add the diced sweet potato, pumpkin purée, broth, cinnamon, nutmeg, salt, and pepper. Bring the mixture to a simmer and cook for 15–20 minutes, or until the sweet potato is tender.
    3. Stir in the almond milk, then use an immersion blender (or regular blender) to blend until smooth and creamy.
    4. Remove the pot from the heat before adding Greek yogurt. Let it cool slightly for 1 to 2 minutes first. This helps prevent the yogurt from curdling and keeps the soup silky.
    5. Serve warm, adding optional toppings for an extra touch!
    Optional texture note:
    If someone prefers a thinner soup, they can add ÂĽ cup extra broth or almond milk while blending.
     

    Tips and Nutritional Notes

    Serve your Bariatric-Friendly Pumpkin Sweet Potato Soup warm, accompanied by a dollop of Greek yogurt, a sprinkle of roasted pumpkin seeds, or a few fresh chives for added color. Pair with roasted veggies or a slice of whole-grain toast for a comforting, high-protein fall meal that feels indulgent yet light.
     
    Each serving (1 cup) provides approximately 150–170 calories, 10g protein, 20g carbohydrates, and 3g fat, depending on the milk and yogurt choice.
     
    For those looking to add a protein boost, consider adding a scoop of unflavored protein powder! If you prefer a sweeter flavor, substitute half the pumpkin purée for pureed carrots. This healthy fall soup recipe stores beautifully in the fridge for up to 3 days or can be frozen in portioned containers.
     
    This soup is low in fat, high in fiber and protein, making it perfect as a bariatric-friendly fall meal or gentle post-surgery comfort food. Serve it alongside a small portion of Greek yogurt, roasted vegetables, or a slice of whole-grain toast for a balanced meal.
     

    Share Your Creations!

    I’d love to hear about your favorite bariatric-friendly fall soups or see your delicious creations of this pumpkin sweet potato soup! Feel free to post your dishes on Pinterest or Instagram and tag me!
     

  • Bariatric-Friendly Stuffed Shells with Sausage and Spinach Sauce: A Heartwarming Recipe

    Bariatric-Friendly Stuffed Shells with Sausage and Spinach Sauce: A Heartwarming Recipe

    Rediscovering Comfort Food

    Hi there, I’m Valerie! After my bariatric surgery, I often found myself longing for my favorite Italian comfort dishes, especially stuffed shells. The rich flavors and wholesome textures felt distant until I decided to lighten up the recipe. I was surprised to discover how I could create a bariatric-friendly version that satisfies those cravings without the guilt! These stuffed shells are not only delicious but filled with lean protein, fresh greens, and comforting flavors.

    Ingredients You’ll Need

    • 8–10 whole wheat or protein pasta shells (or small shells if portioning smaller)
    • ½ lb lean turkey or chicken sausage, removed from casing
    • 1 cup part-skim ricotta cheese
    • ½ cup nonfat Greek yogurt (to boost protein and creaminess)
    • 1 cup fresh spinach, chopped
    • ½ cup reduced-fat mozzarella cheese
    • 1 cup low-sodium marinara or tomato sauce
    • 1 clove garlic, minced
    • 1 tsp Italian seasoning
    • Salt and pepper to taste
    • Optional garnish: chopped basil or light grated parmesan
    Optional add-ins:
    • 1 tablespoon of grated zucchini or riced cauliflower mixed into the filling for more volume and fiber.
    • A pinch of red pepper flakes for a touch of spice (only if tolerated).

    Step-by-Step Instructions

    1. Preheat oven to 375°F (190°C).
    2. Cook shells according to package directions until just al dente (they’ll continue cooking in the oven). Drain and let cool slightly.
    3. Brown sausage in a skillet over medium heat, breaking it into fine crumbles. Once browned, add garlic and spinach; cook until wilted (about 2–3 minutes). Remove from heat.
    4. In a bowl, combine ricotta, Greek yogurt, and half the mozzarella. Stir in the sausage-spinach mixture and season with Italian herbs, salt, and pepper.
    5. Spread half the marinara sauce in the bottom of a small baking dish.
    6. Stuff each shell with 1–2 tablespoons of filling and arrange seam-side up.
    7. Spoon over the remaining sauce and sprinkle with the rest of the mozzarella.
    8. Bake uncovered for 20–25 minutes, until hot and bubbly with light golden edges.
    9. Cool for 5 minutes before serving (to set the filling).
    Tip: Cover loosely with foil halfway through baking if the cheese browns too fast.

    Tips for Perfect Stuffed Shells

    For an extra protein boost, consider using protein-enriched or chickpea shells. If you prefer a smoother sauce, blend the spinach into the marinara. When serving, start with 1–2 stuffed shells per meal, paired with veggies or a crisp side salad. This meal is high in protein, lower in carbs and fat, making it a perfect post-bariatric comfort food option.
    Add a spoonful of extra sauce under each portion when plating for presentation and moisture.
    Store leftovers in an airtight container up to 3 days. Reheat gently in the oven or microwave with a splash of broth to prevent drying out.

    Join the Community!

    I’d love to hear about your own bariatric-friendly Italian recipes or see photos of your stuffed shells! Share them on Pinterest or Instagram to inspire others in our community. Let’s find comfort in cooking together!
  • Bariatric-Friendly Kale Apple Slaw Salad Recipe

    Bariatric-Friendly Kale Apple Slaw Salad Recipe

    Finding Joy in Crunchy Salads

    Hi! I’m Valerie. I used to find cooking a bit overwhelming, just like some of you might. After my bariatric surgery, I wanted salads that were crunchy and refreshing but still filling. That’s how I came up with this kale apple slaw salad. It’s full of flavor, easy to make, and works well for a bariatric-friendly diet.

    Ingredients for Deliciousness

    To whip up this healthy kale apple slaw, you’ll need:
    • 3 cups chopped kale (massaged to soften)
    • 1 small apple, thinly sliced or julienned
    • ½ cup shredded carrots
    • ÂĽ cup thinly sliced red cabbage
    • 2 tbsp sunflower seeds or sliced almonds
    • 2 tbsp nonfat Greek yogurt
    • 1 tbsp apple cider vinegar
    • 1 tsp honey or sugar-free sweetener (optional)
    • 1 tsp Dijon mustard
    • Salt and pepper to taste
    Optional additions for variety:
    • 1 tsp chia seeds or pumpkin seeds for extra fiber.
    • A few cranberries (sugar-free) for a sweet-tart pop (optional for those further out from surgery).

    Simple Steps to Prepare Your Salad

    Follow these easy steps to create a fresh bariatric meal:
    1. Massage the kale with a pinch of salt until tender.
    2. After massaging the kale, pat it dry lightly to prevent the dressing from thinning.
    3. In a small bowl, whisk together the Greek yogurt, apple cider vinegar, mustard, and honey.
    4. Toss the kale, apples, carrots, and cabbage with the dressing until well coated.
    5. Sprinkle with sunflower seeds or almonds before serving.

    Tips and Nutritional Benefits

    For added protein, consider topping your salad with grilled chicken or chickpeas. Want a brighter flavor? Lemon juice is a great alternative to vinegar. This salad keeps well in the fridge for up to 2 days, making it a perfect choice for easy post-bariatric lunches. Moreover, it’s high in fiber and vitamins and supports digestion while keeping you full!

    Serving Suggestions

    Enjoy this salad chilled as a side dish or light lunch. Pair it with grilled chicken or salmon for a complete, low fat high protein meal!

    STORAGE

    This salad stays fresh in the fridge for up to 2 days, making it great for meal prep.
    Stays crisp when stored undressed; you could note this tip for readers:
    Store the dressing separately and toss right before serving for the best crunch.

    Share Your Creations!

    I’d love to see your versions of this bariatric-friendly salad recipe! Please share your culinary delights on Pinterest or Instagram and tag your healthy creations. Let’s inspire each other to enjoy tasty and nutritious meals!
  • Comfort in a Bowl: Bariatric-Friendly Sweet Potato Corn Chowder

    Comfort in a Bowl: Bariatric-Friendly Sweet Potato Corn Chowder

    A Journey to Comforting Meals

    After my bariatric surgery, I really missed the creamy, cozy soups I used to make. With my new dietary needs, those rich, heavy recipes were off the table. Then I discovered this sweet potato corn chowder. It uses sweet potatoes for creaminess instead of heavy cream, so it’s healthier, comforting, and full of protein.

    Ingredients You’ll Need

    To whip up this nutritious chowder, gather the following:
    • 1 medium sweet potato, peeled and diced
    • 1 cup frozen or fresh corn kernels
    • 1 cup low-sodium chicken or vegetable broth
    • ½ cup unsweetened almond milk or skim milk
    • ½ cup nonfat Greek yogurt for creaminess
    • ½ small onion, diced
    • 1 clove garlic, minced
    • 1 tsp olive oil or light butter
    • Salt and pepper to taste
    • Optional: smoked paprika, chives, or turkey bacon bits for garnish
    • Optional Additions:
    • Add 1/4 teaspoon of cumin or thyme to give the chowder more flavor and warmth without making it heavy.
    • Stir in 1 tablespoon of finely diced celery or carrot to boost both the flavor and texture.

    Whip It Up: Step-by-Step Instructions

    1. Heat olive oil in a pot over medium heat.
    2. Cook the onion and garlic until they are soft and smell fragrant, about 2 to 3 minutes.
    3. Add diced sweet potato, corn, broth, salt, and pepper.
    4. Let everything simmer for 15 to 20 minutes, or until the sweet potato is soft.
    5. Lower heat, then stir in almond milk.
    6. Remove from heat, then stir in Greek yogurt until creamy.
    7. Taste and adjust the seasonings as needed. If you want a thicker chowder, mash it a bit or blend half of it.
    Texture Tip:
    If you decide to blend the chowder, keep about a quarter of the corn whole so it looks nice and has some texture.

    Nutrition Notes

    Each serving (about 1 cup) provides approximately 160–190 calories, 11g protein, 22g carbs, and 3g fat, depending on your milk and yogurt choice.

    Helpful Tips and Servings

    Enjoy this warm, cozy sweet potato corn chowder with a little smoked paprika, some chopped chives, or a few turkey bacon bits on top. For a full high-protein meal, add a side of Greek yogurt, cottage cheese, or a small green salad.
    This chowder is full of fiber and protein, low in fat, and easy to digest, so it’s great for post-bariatric comfort food. I’d love to see your own versions—share your creations and other bariatric-friendly soups on Pinterest or Instagram!

  • Bariatric-Friendly Rice Potato Casserole: A Cheesy Comfort Food Alternative

    Bariatric-Friendly Rice Potato Casserole: A Cheesy Comfort Food Alternative

    Rediscovering Comfort Food

    After my bariatric surgery, I often found myself craving the creamy, cheesy comfort foods I loved, especially scalloped potatoes. The idea of making a lighter version seemed daunting at first, but I soon learned to embrace my kitchen. With a bit of creativity, I crafted this bariatric-friendly rice potato casserole, a comforting dish that balances cauliflower rice and thinly sliced potatoes without the guilt.

    Ingredients You’ll Need

    To make this delicious casserole, gather the following ingredients:
    • 1 cup thinly sliced potatoes (Yukon gold or red)
    • 1 cup cooked cauliflower rice or regular rice alternative
    • 1 cup reduced-fat shredded cheese (cheddar or Monterey Jack)
    • ½ cup nonfat Greek yogurt or light sour cream
    • ½ cup unsweetened almond milk or skim milk
    • 1 tbsp light butter or olive oil
    • ½ tsp garlic powder
    • ½ tsp onion powder
    • Salt and pepper to taste
    Optional toppings: chives, turkey bacon bits, or a sprinkle of paprika.
    Optional Additions for Better Consistency:
    • Add 1 teaspoon of cornstarch or 1 tablespoon of unflavored protein powder to the sauce mix. This helps the creamy base set well and keeps it from separating.
    • If lactose-sensitive, substitute Greek yogurt with lactose-free yogurt or light ricotta.

    Step-by-Step Instructions

    Creating this low-carb cheesy casserole is easier than you think!
    1. Preheat oven to 375°F (190°C) and lightly grease a small baking dish.
    2. Par-cook the potato slices for 5 minutes in the microwave or boiling water until just tender. (This ensures the potatoes are soft without overbaking.)
    3. Layer half of the potatoes, half of the cauliflower rice, and half of the sauce in the dish. Repeat the layers.
    4. Whisk together the Greek yogurt, milk, melted butter, seasonings, and half the cheese. Pour evenly over the layers.
    5. Top with the remaining cheese and optional toppings.
    6. Bake uncovered for 25 to 30 minutes, until the top is golden and bubbly.
    7. Rest for 5 minutes before serving for easier portioning.
    Tip: Baking uncovered gives a golden crust; covering for half the bake time keeps the casserole moist.

    Tips for a Balanced Meal

    For extra protein, consider adding shredded chicken or ground turkey. You can swap cauliflower rice for creamy mashed cauliflower for an even richer texture. Remember to keep portions small and pair this dish with a lean protein for a balanced meal. S

    Nutritional Benefits & Serving Suggestions

    Serve warm with steamed green beans, sautéed spinach, or a fresh cucumber salad. This low-carb cheesy casserole makes a satisfying side or even a main dish for smaller appetites.
    Each serving, about three-quarters of a cup, has roughly 180 to 220 calories, 18 grams of protein, 10 grams of carbs, and 7 grams of fat, depending on your toppings and cheese.
    This bariatric comfort food recipe is high in protein, low in fat, and has fewer carbs than traditional scalloped potatoes. Serve it with a side of steamed vegetables or a small salad for a complete, cozy dinner option.

    Join the Community

    I’d love to see your bariatric-friendly comfort food creations! Share them on Pinterest or Instagram and let’s inspire each other with healthy meal ideas!
  • Easy Bariatric-Friendly Monterey Chicken Recipe

    Easy Bariatric-Friendly Monterey Chicken Recipe

    Discovering Healthy Comfort Foods

    Hi friends! I’m Valerie. After my bariatric surgery, I started looking for lighter takes on my favorite restaurant meals. One of my favorites is this healthy Monterey chicken recipe. It hits the spot and helps me stay on track with my nutrition.

    Ingredients for Monterey Chicken

    Here’s what you’ll need for this simple recipe:
    • 2–4 boneless, skinless chicken breasts
    • 1 tbsp sugar-free BBQ sauce per piece
    • ÂĽ cup reduced-fat shredded cheese per piece
    • 1 medium tomato, diced
    • 2 slices turkey bacon, cooked and crumbled
    • 2 tbsp chopped green onions
    • Optional: Greek yogurt for topping
    Refinements:
    1. Try adding a little black pepper, garlic powder, or paprika to the chicken before the BBQ sauce. It brings out more flavor.
    2. Use about ÂĽ cup of shredded cheese for each chicken breast to keep the portions right for bariatric needs.
    3. Stick to 1 tablespoon of sugar-free BBQ sauce per piece of chicken to keep sugar and calories low.

    Step-by-Step Instructions

    Ready to get cooking? Follow these easy steps:
    1. Preheat oven to 375°F (190°C) or preheat grill.
    2. Season chicken lightly with salt, pepper, and garlic powder.
    3. Cook chicken in a skillet, grill, or oven until the internal temperature reaches 165°F (75°C).
    4. Brush each piece with a thin layer of BBQ sauce.
    5. Top with shredded cheese, diced tomatoes, and turkey bacon.
    6. Bake or broil for 5–7 minutes, until the cheese melts and the toppings are bubbly.
    7. Garnish with chopped green onions before serving.
    Tip: Cover loosely with foil while baking to keep the chicken juicy.

    Helpful Tips

    To keep this meal bariatric-friendly, remember to:
    • Keep portions small for better digestibility.
    • Use sugar-free or low-sugar BBQ sauce to maintain low carb counts.
    • For extra protein, pair the dish with steamed veggies, mashed cauliflower, or a small side salad.

    NUTRITION CHECK

    Perfect for bariatric needs:
    • High in lean protein
    • Low in carbs and fat
    • Easy to digest with small portions
    Each serving is approximately 220–250 calories, with about 28g of protein and very few carbs (depending on your BBQ sauce).

    Serving Suggestions

    Enjoy your Monterey Chicken warm with roasted broccoli, sautéed zucchini, or cauliflower rice. It’s a high-protein, low-carb meal that still feels like a treat.

    Join the Conversation!

    I’d love to hear from you! Share your favorite bariatric-friendly chicken recipes on Pinterest or Instagram. Let’s help each other cook delicious, healthy meals.
  • Comfort in a Bowl: Bariatric-Friendly Slow Cooker 3-Bean Chili Recipe

    Comfort in a Bowl: Bariatric-Friendly Slow Cooker 3-Bean Chili Recipe

    Finding Comfort in Slow Cooking

    Hi! I’m Valerie. I used to find cooking a bit overwhelming, but after my bariatric surgery, I started making healthy slow cooker meals that saved me time. This 3-bean chili soon became a favorite at my house. It’s simple, tasty, and good for you.

    Ingredients for Our 3-Bean Chili

    To make this bariatric-friendly chili recipe, you will need:
    • 1 pound lean ground turkey or chicken
    • 1 can low-sodium chicken broth
    • 1 can of rinsed black beans
    • 1 can of rinsed kidney beans
    • 1 can of crushed tomatoes
    • 2 tablespoons chili powder
    • 1 teaspoon cumin
    • 3 cloves garlic, minced
    • 1 cup diced bell peppers and onions
    • Optional toppings: Greek yogurt, avocado slices, reduced-fat cheese
    • For early-stage post-op diets, start with 1 type of bean or mash them for easier digestion.

    Step-by-Step Instructions

    Follow these simple steps to create your chili:
    1. Brown the ground turkey or chicken in a large skillet.
    2. After browning, drain any liquid, then add the meat and all remaining ingredients to the slow cooker.
    3. Mix until well combined.
    4. Cover and cook on low for 6 to 8 hours or on high for 3 to 4 hours.
    5. Enjoy this comforting, bariatric-friendly chili with Greek yogurt, cilantro, or avocado for a healthy addition of fats. It works well for meal prep, light lunches, or a filling dinner at any stage after surgery.

    Tips for Success

    As you embark on your healthy eating journey, keep these tips in mind:
    • For bariatric portion control, serve in small bowls.
    • This chili is freezer-friendly! Make extra and reheat for busy days.
    • Feel free to adjust the spice levels or swap out veggies to suit your taste.

    Nutritional Benefits

    Each serving is around 200–250 calories, rich in protein, and packed with fiber to keep you full and energized.
    This high-protein 3-bean chili is rich in fiber yet low in fat and sodium. It helps with digestion and fits well with post-surgery nutrition goals, making it a great easy dinner after bariatric surgery.

    Join the Conversation

    I’d love to see how you make this chili your own! Share your meal prep photos on Pinterest or Instagram so we can encourage each other. Happy cooking!
  • Bariatric-Friendly Snowballs: A Lightened-Up Russian Teacakes Recipe

    Bariatric-Friendly Snowballs: A Lightened-Up Russian Teacakes Recipe

    Rediscovering Joy in Baking

    Hi, I’m Valerie. I used to find baking a bit overwhelming, but after my bariatric surgery, I really missed those classic holiday treats—especially Russian teacakes, or snowball cookies. After some trial and error, I came up with a lighter, sugar-free version that still feels comforting and satisfying.

    Ingredients You’ll Need

    To make these delicious bariatric-friendly snowball cookies, gather the following ingredients:
    • 2 cups almond flour
    • ½ cup sugar-free sweetener (erythritol or monk fruit)
    • 1 tsp vanilla extract
    • ½ cup chopped nuts (walnuts or pecans)
    • 2 tbsp softened butter or coconut oil (for structure)
    • ½ cup unsweetened shredded coconut or powdered sweetener (for coating)g

    Easy Step-by-Step Instructions

    1. Preheat oven to 350°F (175°C).
    2. In a mixing bowl, combine almond flour, sweetener, and vanilla extract.
    3. Add butter or coconut oil and mix until a soft dough forms.
    4. Stir in the chopped nuts.
    5. Form small balls (about 1 inch) and place them on a parchment-lined baking sheet.
    6. Bake for 15–18 minutes, until lightly golden on the bottom.
    7. Cool for 5 minutes, then roll warm cookies in shredded coconut or powdered sweetener.
    Tip: Try not to overbake, since almond flour can brown fast. The cookies will get firmer as they cool.

    Tips for Perfect Snowball Cookies

    Store in an airtight container for up to 5 days, or refrigerate for longer freshness.
    Optional festive touch: Roll them twice in the coating for that classic snow-dusted look.

    Nutritional Benefits

    Each cookie is around 90–100 calories, low in carbs, and rich in healthy fats that promote satiety.
    Serving idea (SEO boost):
    These bariatric-friendly snowballs pair perfectly with tea, espresso, or a protein hot cocoa for a cozy winter treat.

    Serving Suggestions

    These bariatric-friendly snowballs pair perfectly with tea, espresso, or a protein hot cocoa for a cozy winter treat.

    Share Your Creations!

    I encourage you to share your bariatric-friendly holiday baking creations with the community on Pinterest or Instagram. Happy baking, everyone!